
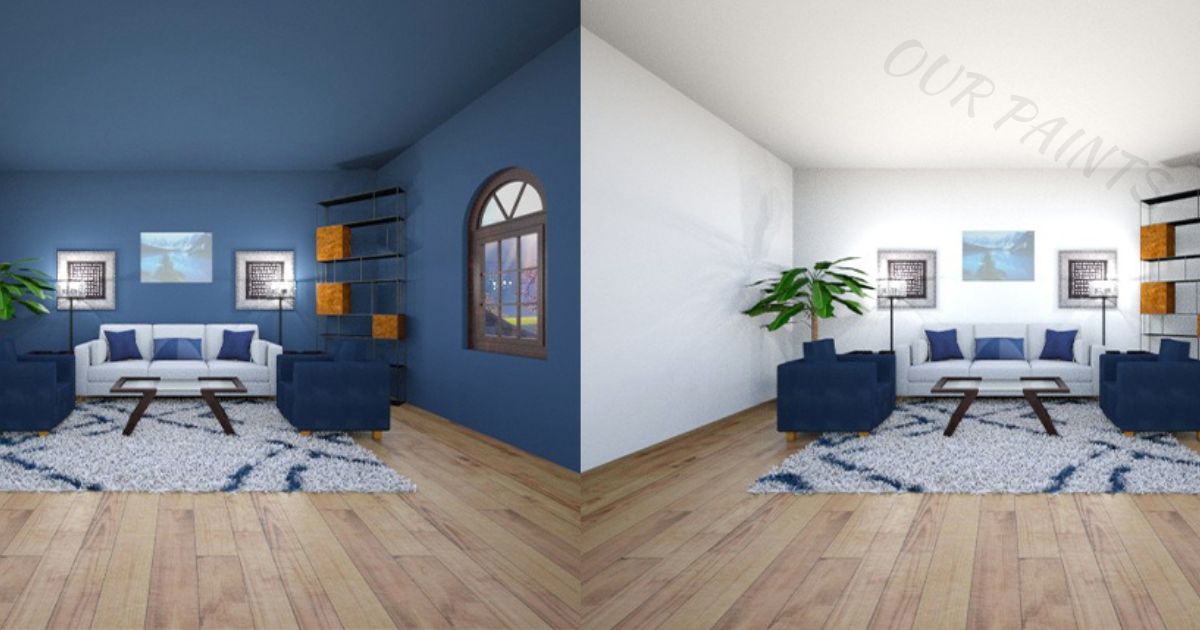
In the intricate journey of transforming a room with paint, understanding the meticulous process of how to paint a room transcends mere application. Preparing for this creative endeavor involves meticulous steps—clearing furniture, safeguarding the floor, and meticulously cleaning walls.
The choice of primer, essential tools like quality brushes and painter’s tape, and the precise technique employed greatly influence the final outcome. Layering paint, evaluating surfaces, and cherishing the transformative impact round off this artful journey.
This holistic approach signifies a blend of precision, patience, and creativity, culminating in a space redefined by color and finesse.
Preparation Is Key: Setting The Stage
Before embarking on a painting project, meticulous preparation lays the groundwork for a successful outcome. Each step in this phase is crucial to achieving a flawless finish that enhances the room’s aesthetics.
Clearing the Space for Precision
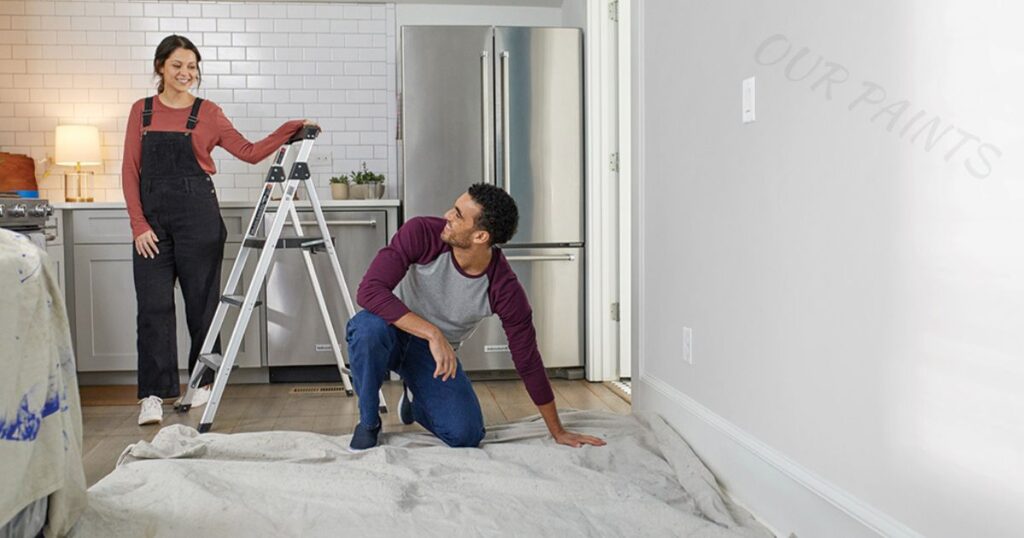
The initial step in preparing to paint a room involves a meticulous clearing process. Removing furniture creates an unobstructed canvas for painting, allowing for easy access to all walls and corners. This strategic approach prevents accidental smudges or paint splatters on valuable belongings, ensuring a smooth, hassle-free painting experience.
Protective Measures and Surface Readiness
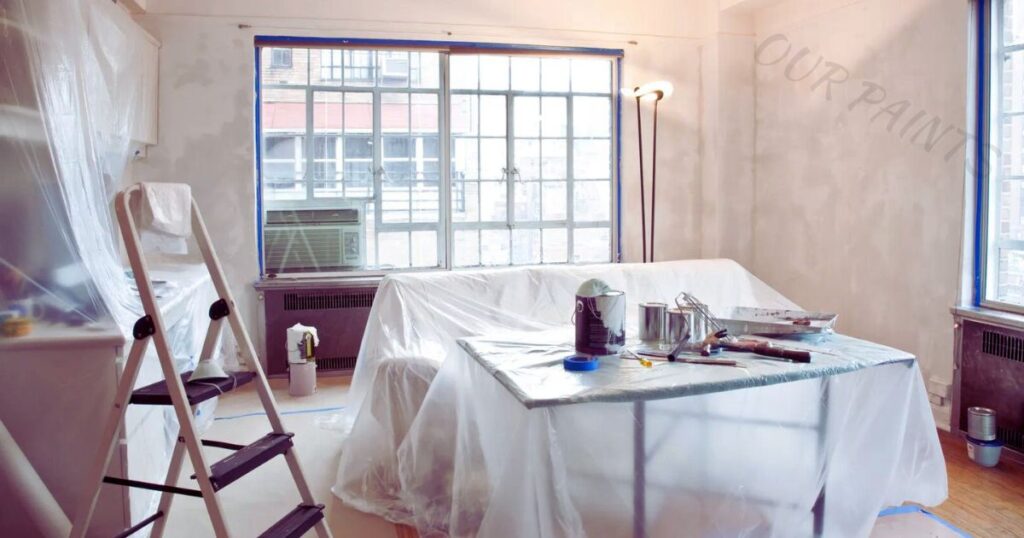
Covering the floor with drop cloths acts as a safeguard against paint spills or drips, preserving the flooring’s integrity. Removing outlet covers, switch plates, and fixtures not only prevents paint from adhering to these elements but also ensures a seamless painting process around them.
The Art of Pristine Surfaces
To attain a flawless end result, the walls demand meticulous attention. Thoroughly cleaning the walls is imperative to remove any dust, dirt, or grease that might hinder paint adhesion. A clean surface ensures the paint adheres evenly and prevents imperfections that could mar the final appearance. This step sets the stage for a pristine canvas, allowing the paint to showcase its true color and texture.
Thorough Steps for Impeccable Results
Begin by emptying the room of all furniture, considering protective coverings for the floor, and meticulously cleaning the walls. These initial stages establish an optimal environment for painting, ensuring the best possible outcome.
The removal of outlet covers, switch plates, and fixtures prevents them from being inadvertently coated with paint, maintaining their functionality and appearance. Covering the floor with drop cloths not only protects the flooring but also simplifies the cleanup process.
A key to a flawless finish lies in the preparation of the walls. Cleaning them thoroughly removes any contaminants, guaranteeing a smooth and uniform paint application. This groundwork sets the stage for the subsequent painting stages, ensuring the paint adheres effectively and the final result is impeccable.
By meticulously adhering to these preparatory steps, the painting process is streamlined, maximizing the potential for a professional-grade finish. The care invested in preparation lays the foundation for a visually stunning transformation, elevating the entire ambiance of the room.
Gather The Right Tools: Equip Yourself
Equipping oneself with the right tools and materials is pivotal in ensuring a seamless and successful painting endeavor. From brushes to paint types, each element plays a crucial role in achieving a professional-grade finish.
Quality Tools for Precision and Efficiency
Investing in high-quality brushes, rollers, trays, and painter’s tape is an investment in precision and efficiency. Quality tools ensure smoother application, minimize streaks and enable better control over paint distribution. A sturdy ladder is indispensable for reaching higher areas, ensuring safety, and maintaining a consistent stroke throughout the walls.
Primer: The Foundation for Superior Results
The decision to use primer significantly impacts the final outcome of the paint job. If the walls require it, applying primer before painting enhances paint adherence, evens out surface imperfections, and ensures a more vibrant color payoff. Choosing a tinted primer that aligns with the paint color intensifies the richness of the final hue.
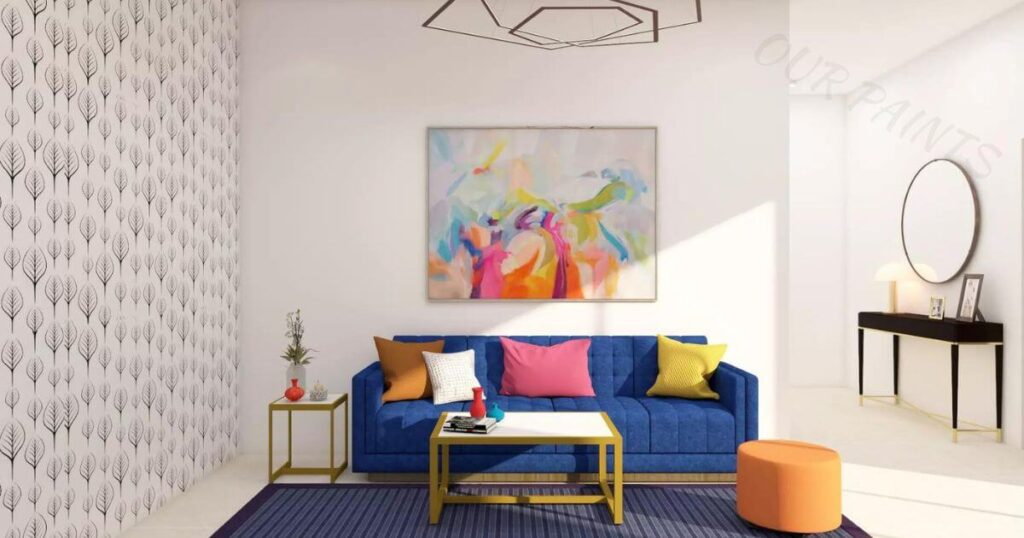
Paint Selection: Aesthetic and Functional Considerations
Selecting the right paint type and finish is essential for both aesthetic appeal and functionality. Consider factors such as the room’s purpose, lighting conditions, and desired ambiance when choosing paint. Matte finishes hide imperfections but might not be as durable as satin or semi-gloss finishes, which are easier to clean and maintain.
Precision in Choice, Mastery in Execution
Investing in high-quality tools such as brushes, rollers, and painter’s tape guarantees precision and efficiency in the painting process. A sturdy ladder ensures safety and uniform strokes throughout the walls, contributing to a professional finish.
The application of primer is a critical decision that influences the paint’s adherence and final appearance. A primer not only improves adhesion but also creates a smooth surface, enhancing the paint’s true color and durability.
Opting for a tinted primer that complements the chosen paint color intensifies the richness and depth of the final hue. Choosing the appropriate paint type and finish is not only about aesthetics but also functionality. Considering the room’s use and lighting conditions aids in selecting the ideal paint type.
Understanding the differences between finishes ensures a paint job that not only looks good but also lasts longer and is easier to maintain. By meticulously selecting the right tools and materials, understanding the importance of primer, and choosing the perfect paint type and finish.
You set the stage for a painting process that ensures professional-quality results. Each element contributes to the overall success of the project, culminating in a visually stunning and durable finish.
Master The Art Of Tape And Protection: Precision Matters
Achieving clean lines and safeguarding areas not meant for painting demands mastery in using painter’s tape and protective measures. Precision in this stage is pivotal for a flawless paint job and maintaining the integrity of adjacent surfaces.
Painter’s Tape: A Key to Clean Edges
Utilizing painter’s tape strategically along edges, trims, and areas to be protected ensures crisp, clean lines. Applying the tape precisely and firmly while avoiding air bubbles or gaps is crucial.
Ensuring the tape adheres completely prevents paint bleed-through and maintains sharp delineations between painted and unpainted surfaces.
Precision Protection for Unpainted Areas
Protecting areas not intended for painting requires meticulous attention to detail. Using drop cloths or plastic sheeting to cover floors, furniture, and fixtures shields them from accidental paint splatters or drips.
Diligent application of protective materials ensures that the painting process remains contained and focused solely on the intended surfaces.
The Importance of Methodical Application
The application of painter’s tape and protective coverings demands a methodical approach. Starting from one end and carefully smoothing the tape along the edges guarantees uniform adhesion.
When using drop cloths or plastic sheeting, ensuring complete coverage and secure placement prevents any unintended contact with paint.
Precision and Protection: The Foundation of Neatness
Painter’s tape is an invaluable tool for achieving clean lines and crisp edges during the painting process. Proper application without gaps or bubbles ensures paint stays precisely where intended, eliminating any bleed-through for a professional finish.
Protecting areas not meant for painting, such as floors, furniture, and fixtures, is crucial in maintaining their original state. Using drop cloths or plastic coverings with precision ensures a contained workspace and shields surfaces from accidental paint spills or splatters.
Methodical application of painter’s tape and protective coverings is essential. Starting at one point and carefully securing the tape along the edges prevents any inconsistencies in adhesion.
Similarly, ensuring thorough and secure coverage with drop cloths or plastic sheeting guarantees comprehensive protection against paint contact.
Mastering the art of tape application and protective measures is fundamental to achieving a flawless paint job. Precision in these preparatory steps is critical for maintaining the integrity of surfaces and ensuring the painting process remains focused and controlled. This attention to detail sets the stage for a polished and professional-looking end result.
Start With Primer: Lay The Foundation
Primer acts as the foundational base for a successful paint job, significantly impacting the final appearance and durability of the painted surface. Beginning with primer sets the stage for a flawless finish, enhancing paint adhesion and ensuring a uniform, long-lasting coat.
Enhancing Adhesion and Surface Uniformity
Primer serves as a preparatory layer that facilitates better adhesion between the paint and the surface. It creates a consistent surface texture, filling in imperfections and providing an even canvas for the paint application. This foundation primes the surface, allowing the paint to adhere more effectively and uniformly.
Addressing Surface Imperfections
The application of primer is particularly beneficial for addressing surface flaws. It conceals minor blemishes, such as small cracks or uneven areas, resulting in a smoother and more polished final appearance. The printer’s ability to level out imperfections contributes to a professional-grade finish.
Amplifying Paint Brilliance and Longevity
Using primer not only intensifies the richness of the paint color but also extends the longevity of the paint job. It prevents the paint from soaking into porous surfaces, ensuring the color maintains its vibrancy. Primer acts as a barrier, protecting the surface from moisture and other external elements, thereby enhancing the paint’s durability.
Primer: The Canvas Enhancer
Primer serves as the essential base for a flawless paint job, improving adhesion between the paint and the surface. Its ability to create a uniform texture addresses imperfections, ensuring a smooth and even canvas for paint application.
Addressing surface imperfections is crucial, and primer excels at hiding minor flaws, resulting in a polished final appearance. By leveling out uneven areas and concealing imperfections, primer sets the stage for a professional-grade finish.
The use of primer not only intensifies the brilliance of the paint color but also extends the lifespan of the paint job. Its role in preventing paint absorption into porous surfaces maintains the vibrancy of the color.
Acting as a protective shield, primer enhances the paint’s durability against external factors, ensuring a long-lasting and pristine finish. Beginning with primer is the key to a flawless paint job.
Its role in improving adhesion, concealing imperfections, and enhancing paint longevity cannot be overstated. This foundational step paves the way for a visually stunning and enduring paint finish.
Technique Matters: Painting With Finesse
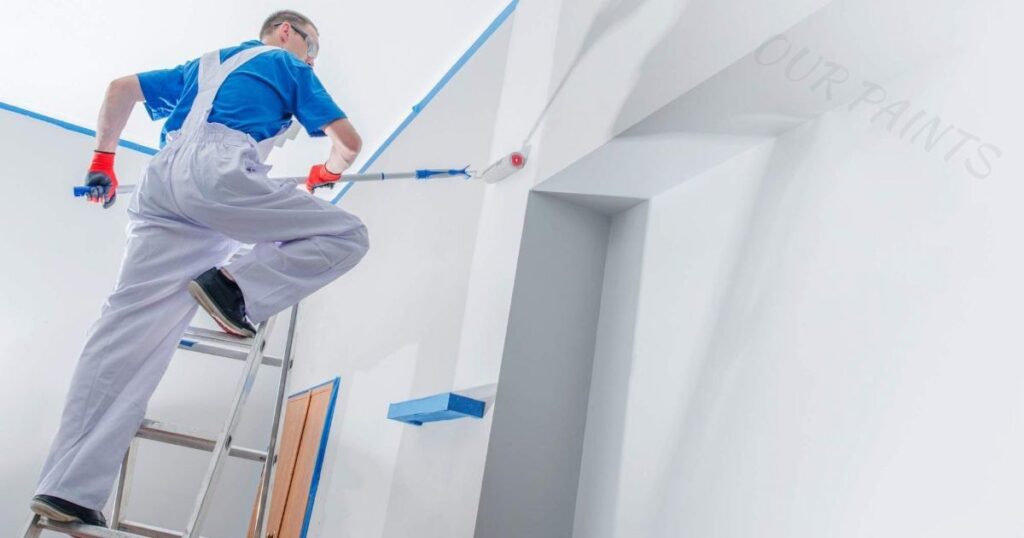
Mastering painting techniques is crucial for achieving a flawless, professional-grade finish. Each stroke and method contributes to the overall quality and appearance of the painted surface, requiring finesse and precision in execution.
Precision in Cutting In
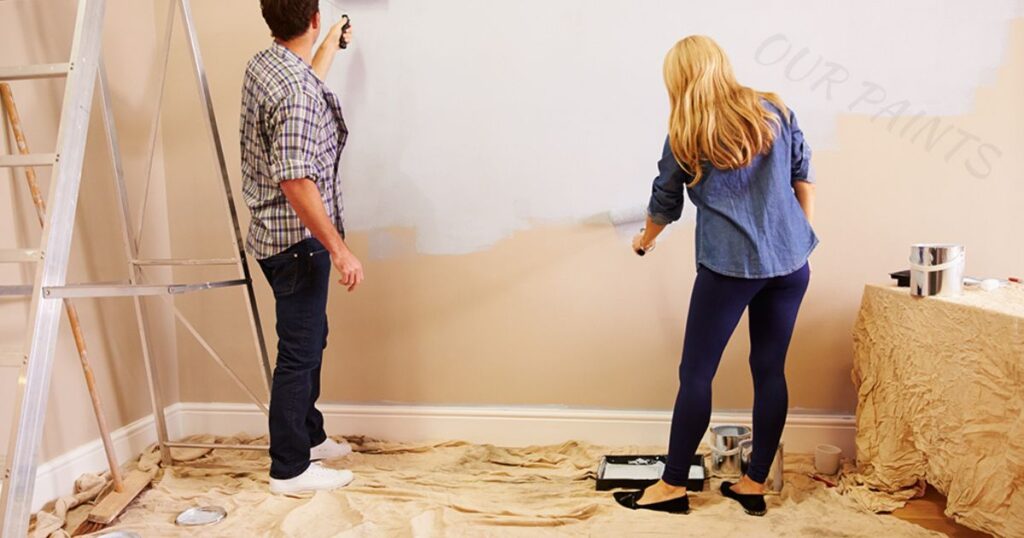
Begin by “cutting in” along edges and corners with a high-quality brush. This technique involves painting a straight line where the wall meets the ceiling, trim, or corners. It demands a steady hand and controlled movements to ensure crisp, clean lines, enhancing the room’s visual appeal.
Roller Application for Larger Surfaces
Using a roller for larger wall surfaces is key to achieving an even coat of paint. Employ a “W” or “M” technique while rolling paint onto the walls to ensure uniform coverage without streaks or overlaps. Maintaining consistent pressure and avoiding excessive paint on the roller is crucial for a smooth finish.
Maintaining a Wet Edge
To prevent visible seams or lines between paint sections, maintain a “wet edge” while painting. This means overlapping each stroke slightly with the previously painted area. Working in manageable sections and keeping a consistent rhythm helps maintain a seamless finish.
Fine-Tuning for Consistency
Periodically step back and evaluate the painted surface to ensure consistency in color and texture. Touch up any uneven areas or missed spots while the paint is still wet, ensuring a cohesive and professional appearance.
Precision and Technique: The Essence of Professionalism
Painting with finesse involves mastering techniques like cutting in along edges for clean lines and using rollers for uniform coverage. Keeping a wet edge while painting prevents visible seams, contributing to a seamless finish.
Applying paint with precision demands controlled movements and consistent pressure to avoid streaks or overlaps. Regularly assessing the painted surface allows for fine-tuning, ensuring a consistent texture and color across the entire area.
Technique matters significantly in achieving a professional-grade finish. Mastering painting techniques, from cutting to roller application, is essential for a flawless outcome.
Each stroke and method contributes to the overall quality and appearance of the painted surface, emphasizing the importance of finesse and precision in execution.
Layering And Patience: Building Colour Gradually
The process of layering paint demands patience and precision, but it’s the key to achieving a rich, even, and long-lasting color on your walls. Each layer contributes to the depth and vibrancy of the final hue, making it essential to approach this phase with meticulous attention to detail.
Thin Coats for Flawless Finish
Applying multiple thin coats of paint ensures a flawless and professional-looking finish. Thin layers dry more evenly, minimizing drips and streaks while allowing the true color to shine through gradually.
Drying Time Between Coats
Patience is vital between each layer. Allowing sufficient drying time between coats ensures proper adhesion and prevents smudging or mixing of colors. Follow the manufacturer’s recommendations for drying times to achieve optimal results.
Assessing and Repeating
After each coat dries, evaluate the surface for uniformity and coverage. Touch up any missed spots or uneven areas to maintain consistency in color and texture. Repeat the process until the desired richness and depth of color are achieved.
Consistency and Longevity
Layering paint not only enhances the color but also contributes to its longevity. Thinner coats adhere better, creating a durable and resilient surface that withstands wear and tear over time.
The Art of Building Color Gradually
Layering paint requires a methodical approach with thin coats that dry evenly, showcasing the true color gradually. Adequate drying time between coats ensures a seamless blend and prevents color mixing.
Assessing the painted surface after each layer allows for adjustments, ensuring a consistent and vibrant color. Layering not only enhances the visual appeal but also reinforces the paint’s durability for a long-lasting finish.
This meticulous process of layering paint demands patience, but it is the cornerstone of achieving a rich and enduring color on walls. Each layer contributes to the overall depth and quality, emphasizing the importance of patience and precision in building color gradually.
Finishing Touches: Detailing And Cleanup
Gentle Removal of Painter’s Tape
Carefully peel off the painter’s tape before the paint fully dries to avoid any peeling or damage to the fresh paint edges. Pull the tape at a 45-degree angle to reveal clean, precise lines, showcasing the meticulousness applied during painting.
Touching Up for Perfection
Examine the painted surface for any missed spots, drips, or imperfections. Use a small brush to touch up these areas, ensuring a seamless blend with the rest of the surface. Attending to these finer details ensures a flawless final appearance.
Tidying Tools and Work Area
Thoroughly clean paint brushes, rollers, trays, and other tools with suitable solvents or water-based cleaners. Tidy the workspace by removing drop cloths, disposing of used materials, and returning furniture and fixtures to their original positions. A neat environment signifies the completion of the project and enhances overall satisfaction.
Appreciating the Final Result
Step back and admire the completed work from various angles and under different lighting conditions. Evaluate the overall quality, noting any areas that might benefit from improvement or Touch-ups. Appreciate the transformation achieved through dedicated effort and attention to detail.
Achieving Precision in Completion
Carefully removing painter’s tape ensures sharp and defined edges, highlighting the precision achieved while painting. Addressing any missed spots or imperfections through touch-ups guarantees a flawless final appearance.
Thoroughly cleaning tools and the workspace signifies professionalism and meticulousness. Lastly, evaluating the finished work from various perspectives allows for appreciation and insights into any necessary final adjustments.
Completion and Evaluation: Admire Your Work
As the painting project nears its completion, taking the time for evaluation and appreciation is paramount. This phase involves inspecting the finished work, ensuring satisfaction, and appreciating the transformation achieved through dedicated effort and attention to detail.
Assessing the Final Outcome
Step back and assess the entire painted area from different viewpoints. Evaluate the quality of the paint job, paying attention to details like color consistency, texture, and any imperfections that might need addressing.
Noting Areas for Improvement
Make notes of any areas that might require Touch-ups or improvement. Even the most meticulously executed projects might have minor imperfections that can be addressed for a more refined finish.
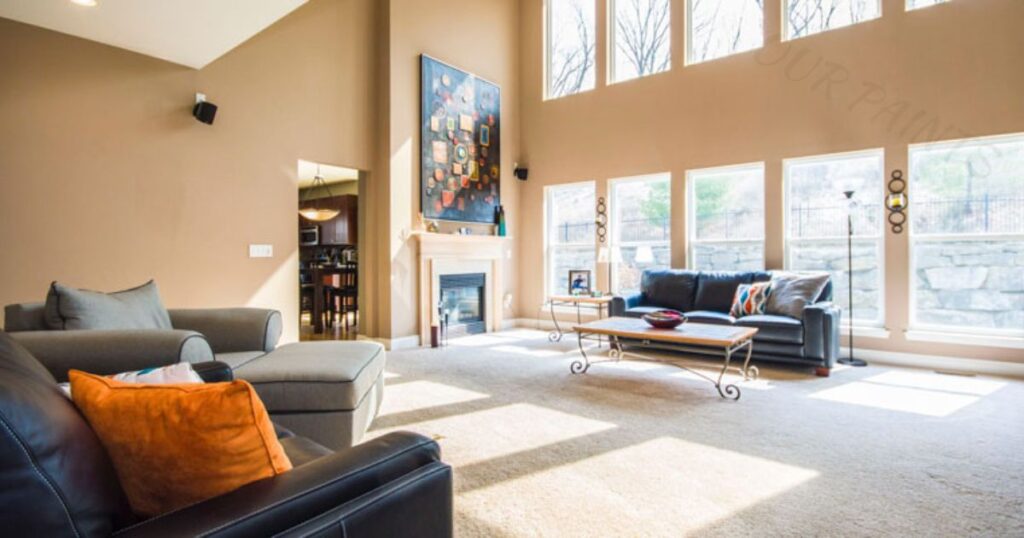
Appreciating the Transformation
Take a moment to appreciate the before-and-after transformation of the room. Reflect on the effort and dedication put into the project and the visual impact of the freshly painted space.
Considering Future Adjustments
Consider any future adjustments or enhancements that could further elevate the room’s ambiance. It could involve adding complementary decor or considering different lighting to accentuate the painted surfaces.
Reflection and Enhancement
Evaluating the final outcome allows for a thorough inspection, ensuring satisfaction and noting any areas for improvement. Appreciating the transformation acknowledges the effort invested and the significant visual change achieved.
Considering potential future adjustments or enhancements encourages a forward-thinking approach, envisioning ways to further enhance the room’s aesthetics or functionality. This phase isn’t just about completion but about reflecting on the process and envisioning future possibilities for the space.
Conclusion:
When wrapping up a room-painting endeavour, the final touches are crucial for a pristine finish. Delicate removal of painter’s tape and meticulous touch-ups ensure clean edges and a flawless surface.
Thoroughly cleaning tools and the workspace indicates professionalism and marks the completion of the project, while evaluating the finished work from different perspectives allows for appreciation and any necessary last-minute adjustments.
These steps ensure a polished, professional outcome and highlight the attention to detail throughout the painting process, making the transformed room a testament to dedication and precision.
Faqs About How To Paint A Room:
What’s the first step before painting a room?
Before painting, prepare the room by clearing furniture and covering the floor with drop cloths to protect it. Remove fixtures and clean the walls thoroughly to ensure a smooth painting surface.
Do I need to use a primer before painting?
Priming is recommended as it enhances paint adhesion and provides a uniform base for the paint. If the walls have imperfections, using a primer helps create a smoother finish.
What tools are essential for painting a room?
Quality brushes, rollers, trays, painter’s tape, a sturdy ladder, and appropriate paint types and finishes are essential tools for a successful paint job.
How do I achieve clean edges while painting?
Use painter’s tape along edges and corners for precise lines. Peel the tape gently before the paint dries completely to ensure sharp, clean edges.
Is it better to use multiple thin coats or one thick coat of paint?
Applying multiple thin coats is recommended for a smoother finish and better coverage. Thin coats dry more evenly and avoid drips or streaks.
How do I clean up after painting?
Clean brushes, rollers, trays, and the workspace with appropriate solvents or water-based cleaners. Remove drop cloths and return furniture to complete the cleanup.
What’s the final step in painting a room?
Evaluate the painted surfaces, touch up any imperfections, and appreciate the finished work from different angles and lighting conditions. This final assessment ensures a professional-grade finish.