
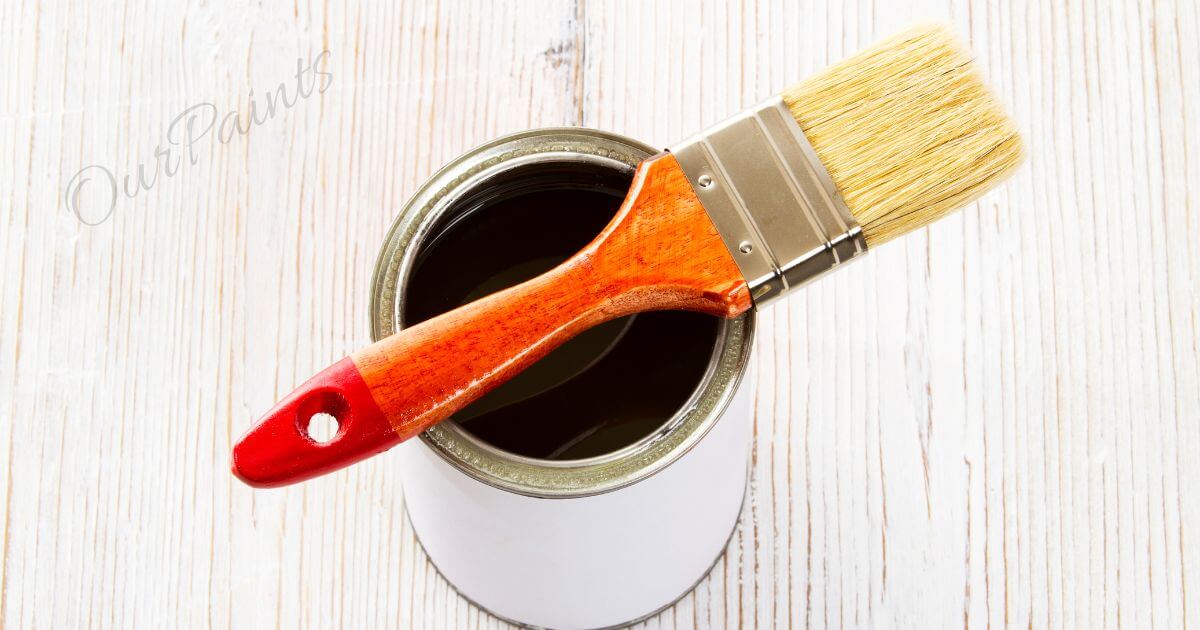
In the world of woodworking, the decision regarding the finishing touch is a pivotal juncture that holds the potential to elevate your craft to unprecedented excellence.
We will explore whether can you put polyurethane over lacquer and the differences between polyurethane and lacquer, and guide when and how to use each one.
Two formidable contenders, polyurethane and lacquer, often take center stage in this deliberation, each brandishing its distinct array of virtues and susceptibilities.
Selecting between them can prove a formidable task, particularly for those new to the craft. Fear not, for within the confines of this discourse, we shall delve deep into the nuances that set polyurethane and lacquer apart.
We shall also guide you on when and how to wield each as your finishing weapon.
We shall unearth the potential of a harmonious marriage between these two finishes, delivering a result that is as resplendent as it is resilient.
As we conclude this exposition, you shall emerge with a comprehensive understanding of why polyurethane may triumph over lacquer, and the means to bestow a flawless visage upon your woodworking endeavors.
Understanding The Differences Between Polyurethane And Lacquer:
The pursuit of flawlessness in your woodworking venture hinges on your comprehension of the stark differences between polyurethane and lacquer.
These two finishes, akin to celestial bodies, radiate their distinctive qualities, each capable of casting a unique spell upon your project’s final countenance.
Polyurethane, a darling of many woodcrafters, stands tall for its stalwart constitution and armor-like properties.
It dries to form an impervious, Herculean coating, unyielding against the assaults of scratches, moisture, and the harsh glare of UV rays.
Its versatility shines through in its availability in both oil-based and water-based iterations, allowing you the luxury of choice by your project’s disposition.
Lacquer, on the other hand, is renowned for its celerity, ushering in a high-gloss denouement. A veritable siren for the aesthetics enthusiast, it swathes your work in a glossy veneer that magnifies the innate beauty of the wood.
The artistry of lacquer application resides in the wielder’s hand, for it is typically administered through a spray gun, bestowing uniformity, and a professional sheen. Alas, lacquer’s Achilles’ heel lies in its durability, demanding periodic attention in the form of touch-ups or reapplication.
The crux of your choice between polyurethane and lacquer hinges on the unique exigencies of your project. When imperiled by the rigors of unforgiving environments or relentless usage, polyurethane’s dauntless protection may well be the shield of choice.
Conversely, for indoor furnishings and decorative opulence, where lustrous aesthetics reign supreme, the siren call of lacquer may be your resounding answer.
To further embellish this discourse, be mindful that polyurethane may occasionally cast a subtle amber tint, with the power to darken the patina of lighter wood over time. In contrast, lacquer, with its clear visage, remains faithful to the original hue of the wood.
Thus, in embracing the disparities of polyurethane and lacquer, you shall embark on the path of informed choice. Whether the clarion call is for resilience or aesthetics, your decision shall etch the saga of a flawless and enduring masterpiece.
Weighing The Pros And Cons Of Preferring Polyurethane Over Lacquer:
Electing to don the mantle of polyurethane over lacquer is a decision consequential in the pursuit of a flawless finish. Before this choice is rendered, it is paramount to tread the path of enlightenment, delving into the pros and cons that line this crossroads.
The citadel of polyurethane boasts exceptional durability, rendering your masterpiece impervious to the ravages of scratches, stains, and the ceaseless march of time.
This makes it a formidable choice for surfaces that bear the brunt of heavy use or confront the harsh vicissitudes of nature. It bestows a protective aura, guarding the beauty of the substrate, and preserving it through epochs.
Further, polyurethane excels in repelling the advances of moisture, standing tall when humidity threatens or spills besiege. Its innate resistance to moisture curbs the mischief of warping, swelling, or other ignoble forms of affliction that all materials are prone to the absorption of dampness.
The price of this impregnability manifests in the intricacies of its application. The alchemy of polyurethane demands meticulous preparation and a deft touch to ensure an even spread devoid of streaks or bubbles. Its ritualistic drying rites may elongate your project’s timeline, urging patience as an unwelcome virtue.
Therein also lies the rub – the visage it bestows. While polyurethane’s shield is robust, it tinges the canvas with a slight amber hue, an aesthetic alchemy that darkens the tapestry of lighter woods. An effect that may be the philosopher’s stone for certain projects but a lament for those seeking a lucid or radiant finish.
In summation, electing polyurethane over lacquer is a pact with the guardians of durability and moisture resistance. But it is a pact that warrants careful preparation and may usher in subtle alterations to your project’s countenance.
The onus rests upon you to weigh these scales of virtue and vice, and decree which cloak best adorns your specific endeavor and desired denouement.
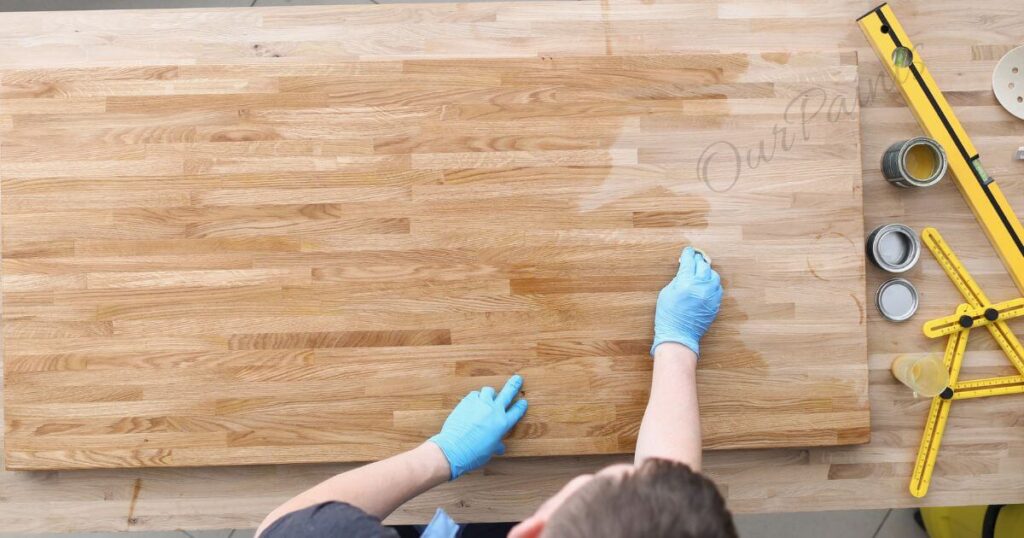
Preparing The Surface For The Finishing Process:
The zenith of a flawless finish beckons, yet it can only be reached through the exalted gateway of surface preparation. A cardinal step that lays the foundation for the grand symphony of finishing.
This foundational overture commences with a ritual of purification, a cleansing to rid the canvas of dirt, dust, or errant debris. Soft cloths and brushes shall serve as your instruments, orchestrated in harmony to cleanse every nook and cranny.
This sanctification is paramount, for even the slightest defilement may desecrate the adhesion of the finish.
Upon this pure canvas, blemishes may still linger – scratches, dents, and asymmetry. With the conductor’s finesse, sandpaper or a sanding block shall embark on the gentle minuet of smoothening.
It shall commence with a coarser grit, a robust overture that shall evolve into a symphony of refinement, a finer grit for a sublime finish.
Having sculpted a serenely smooth surface, the echoes of sanding shall disperse, leaving only the pristine. A cleansing curtain call shall then be summoned, as a tack cloth or a lint-free fabric, caressed by the breath of mineral spirits, whispers away the vestiges of sanding. Here, a clean canvas emerges, ready to bear the caress of finishing materials.
When the canvas is preened, your medium – whether polyurethane or lacquer – shall weave its artistry. In this chapter of the tale, obedience to the manufacturer’s directives is the fulcrum of your success. Bestow thin, even coats, your patience, and discretion, the maestros of each layer.
Allow intervals of drying, as dictated by the composer’s score, a crescendo of layers painting the symphony of a professional visage.
As this prelude concludes, understand that in surface preparation, time is the alchemist’s secret, and effort, is the brush of the virtuoso. Each moment and stroke invested shall, in the denouement, unfurl a tapestry of professional grandeur, flawless and enduring.
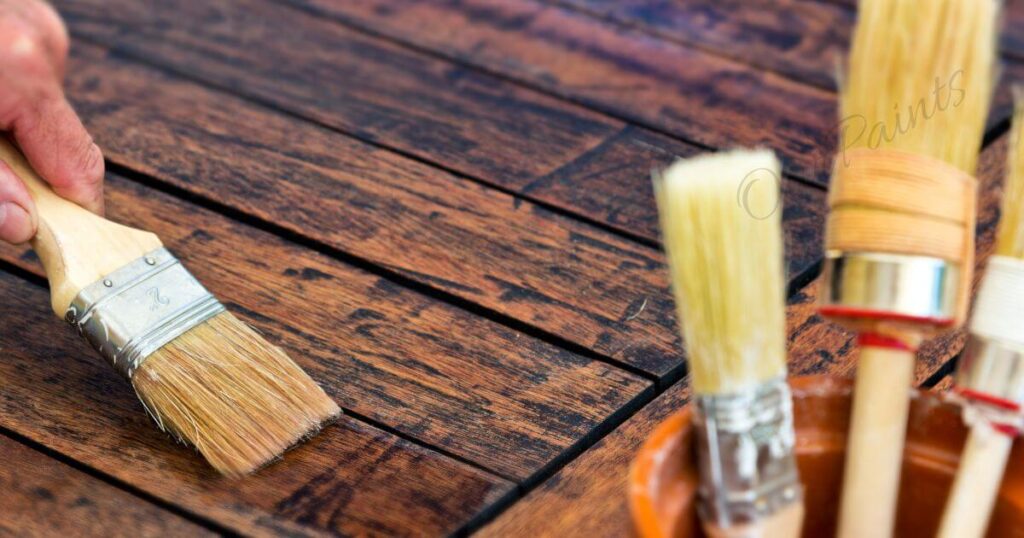
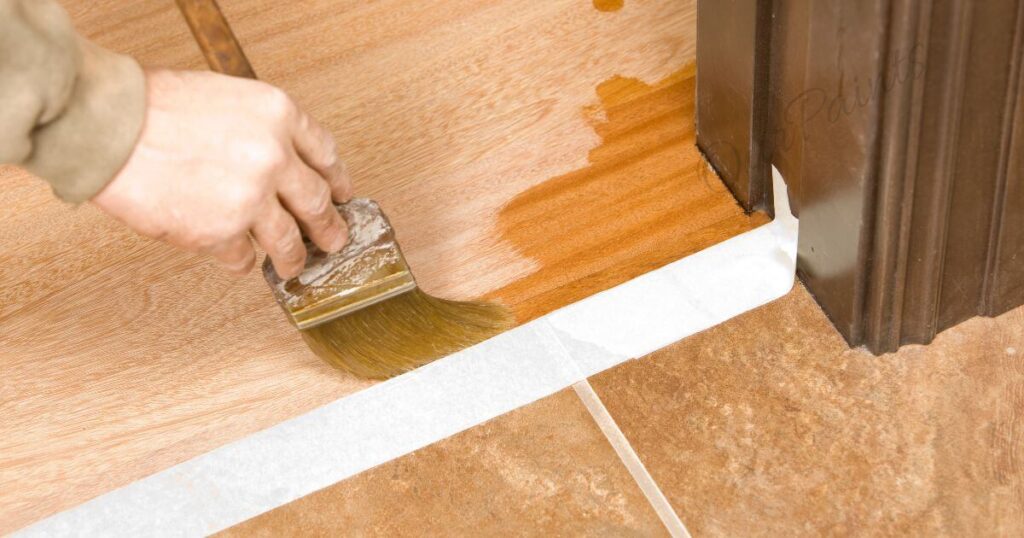
The Lacquer Prelude: Crafting A Resilient Foundation:
In the realm of flawless finishes for your woodworking opus, the act of employing lacquer as a base coat assumes the role of a pivotal overture. Lacquer, with its capacity to forge a smooth and tenacious foundation, breathes life into subsequent layers of polyurethane.
Before the overture of lacquer unfolds, it is imperative to ensure the wood is primed to perfection. The wood’s prelude involves a meticulous act, akin to a virtuoso tuning an instrument. It calls for sanding the wood, ridding it of imperfections such as scratches and blemishes.
In this endeavor, the wood must be bereft of any dust or debris, for lacquer is an unforgiving maestro, quick to reveal the slightest imperfections.
With the stage thus prepared, the grand concerto may commence. Yet, in this act, you must don the garb of protection, for lacquer’s fumes may pose health hazards. With gloves and a mask as your armor, your brush or spray gun shall paint a canvas of thin, even lacquer coats, guided by the wood’s grain.
The refrain of patience echoes through this composition, for each coat must dance in solitude until the curtain of drying descends. This pause is vital, preventing the intrusion of unevenness or the aria of bubbling.
Multiple thin coats, it shall be said, surpass the glory of a single, ponderous coat, securing superior adhesion and an impeccable veneer.
As the layers unfurl, the final curtain rises, and the lacquer’s swift drying time shines in the limelight. Now, the final act shall begin, as polyurethane ascends as the crescendo.
The lacquer, having provided a steadfast foundation, welcomes its partner with grace. Polyurethane, guided by the manufacturer’s notes, bestows thin and even coats, drying intervals punctuating its steps.
In summation, the overture of employing lacquer as a base coat is a crucial stride in the quest for flawlessness.
With the wood’s canvas prepared to sing in harmony with the polyurethane that shall follow, the alliance of lacquer and polyurethane emerges as an indomitable force, forging a durable and aesthetically arresting finish.
The prelude concludes, and the symphony of woodworking glory marches forward.
Sanding And Preparing The Surface For Polyurethane:
Before polyurethane’s benediction over lacquer takes center stage, it is requisite to embark on a pilgrimage of preparation. The surface, the sanctum that shall bear the imprints of the finish, must be sculpted into a flawless canvas, a repository of beauty and endurance.
This journey commences with the assembly of an arsenal of sandpaper, each of varying grits.
The first notes of this opus are played by the coarser grit, often at 120, a lumbering melody that eradicates the imperfections, be they rough spots or vestiges of a former finish. The tempo must be steady, the hand gentle, lest the surface be marred.
With the initial overture done, the melody ascends, and the finer grit, such as 220, weaves a harmonious progression. Each stroke of the hand must be deliberate, even, ensuring no corner of the surface is left untouched. It is here that a smooth foundation is forged, one that polyurethane shall find amicable.
As the symphony nears its climax, a finer grit, perhaps 320, shall resound in the finale. This crescendo further refines the surface, a flourish of finesse that removes any vestiges of imperfection, presenting an unblemished canvas.
As the final notes are struck, the residue, a symphony of dust and debris, must be silenced. In the gallery, a clean lint-free cloth or the tactile grace of a tack cloth, slightly dampened by the caress of mineral spirits, shall conduct this opera.
A canvas pristine and free of particles shall emerge, the gateway to the consummation of finishing.
In some instances, the wood may bear cavities or gaps, akin to a musical composition with misplaced notes.
These imperfections shall be addressed with the grace of wood filler or putty, applied as per the composer’s notes, and left to dry in the hush of patience. Upon completion, this patchwork shall become an indelible part of the symphony.
In the annals of this rhapsody, the sands of time and the sands of preparation converge, bestowing the surface the grace it deserves.
As polyurethane takes the stage, the serenade between finish and surface shall weave a tapestry of enduring allure, a testament to craftsmanship and diligence.
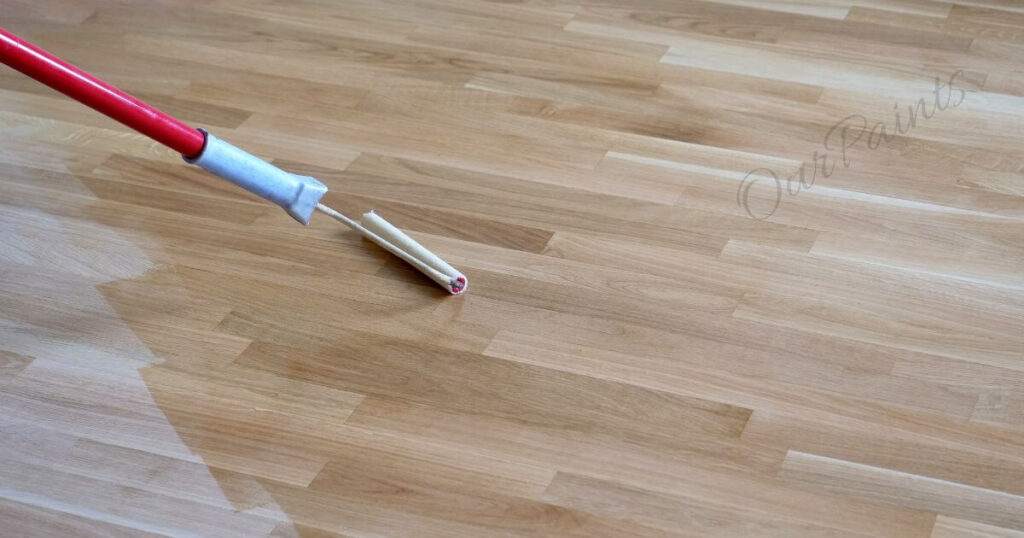
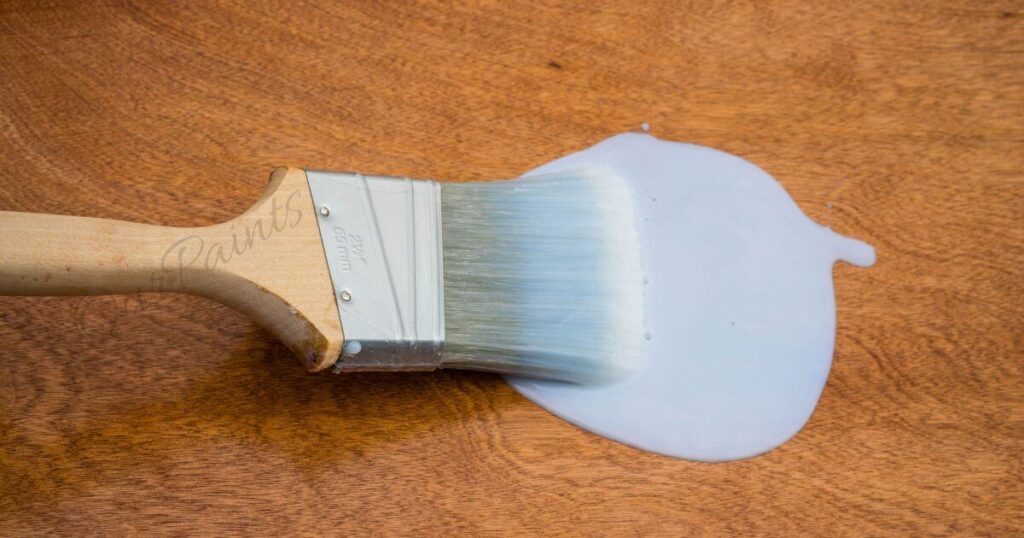
Applying Polyurethane As A Topcoat:
When aiming for that flawless finish on your woodworking projects, introducing polyurethane as the crowning touch can be a game-changing decision. Polyurethane brings with it durability, protection, and an exquisite luster that enhances the innate beauty of the wood.
Before embarking on the polyurethane journey, it’s vital to lay the groundwork properly. Commence by giving the wood a gentle once-over with fine-grit sandpaper to bestow upon it a smooth and uniform surface.
Eradicate any lurking dust or debris with the aid of a tack cloth, providing a pristine canvas for the polyurethane.
The next step involves the selection of the right polyurethane variant for your specific project. Here, you stand at the crossroads of two major options: water-based and oil-based polyurethane. Water-based polyurethane offers the perks of rapid drying, diminished odor, and ease of cleanup.
In contrast, oil-based polyurethane delivers a more traditional, amber-toned finish, along with superior toughness.
With the proper polyurethane in hand, wielding a top-quality brush or foam applicator, apply a thin, uniform coat of this finishing marvel to the wood surface.
Employ long, fluid strokes that trace the wood’s grain, refraining from overbrushing, a practice that might usher in the unwelcome guests of bubbles and streaks. Opt for multiple, wispy coats, permitting each coat its own sweet time to dry completely before ushering in the next.
When the polyurethane has fully embraced the surface, a gentle rendezvous with fine-grit sandpaper is in order.
This rendezvous serves to smoothen out any imperfections or any grain that might have gone rogue. But, before you embark on this smoothing sojourn, ensure that the remnants of dust are cleared away.
Proceed to add thin coats and repeat the sanding ritual until the desired levels of protection and radiance are achieved.
It’s worth noting that polyurethane takes its own sweet time to settle and toughen. Exercise patience, allowing for ample drying intervals between coats to avoid blemishing your masterpiece. To elevate the shine and fortify the polyurethane’s safeguarding, contemplate the addition of a final coat of wax or polish.
By adhering to these steps and embracing the virtue of patience, you’ll be well on your way to crafting that flawless finish with polyurethane as the pièce de résistance.
Whether you’re fashioning furniture, shelving, or any other woodworking project, this guide will be your trusted companion in achieving a professional-looking outcome that will withstand the test of time.
Expert Tips And Techniques For Perfecting Your Finish:
When it comes to attaining that coveted flawless finish on your woodworking projects, the application of the right tips and techniques can be a game-changer.
Whether you’re contemplating the use of polyurethane over lacquer or vice versa, here are some insights from the experts to guide you on your quest for perfection.
Surface Preparation:
The cornerstone of a flawless finish is proper surface preparation. This entails meticulously sanding the wood to create a smooth and uniform texture, eliminating any blemishes, and ensuring the surface is free from dust or debris. A well-prepared canvas lays the groundwork for a flawless finish.
Test on a Sample Piece:
When uncertainty looms over how polyurethane or lacquer will interact with your specific wood type or stain, conducting a test on a sample piece is a prudent move. This allows you to evaluate the finish’s appearance, compatibility, and drying time before embarking on the full-scale project.
Apply Thin and Even Coats:
The application of thin and even coats is paramount when using polyurethane or lacquer. This practice thwarts drips, bubbles, or uneven coverage. Employ a top-tier brush, foam brush, or sprayer to ensure a smooth and consistent application.
Sand between Coats:
The pursuit of a flawless finish necessitates sanding between coats. This step eradicates imperfections, imparts smoothness to the surface, and fosters adhesion between layers. Use fine-grit sandpaper to lightly sand the surface before the application of subsequent coats.
Allow Proper Drying and Curing Time:
A core tenet in the quest for a flawless finish is patience. Adhere strictly to the manufacturer’s guidelines, granting each coat adequate time to dry and cure fully before proceeding with the next coat or handling the finished piece. Haste in this process can breed imperfections or jeopardize the finish.
Buff and Polish:
After the final coat has cured, you can elevate your finish to the next level by indulging in a bout of buffing and polishing. Employ a high-quality polishing compound and a gentle touch, utilizing a soft cloth to meticulously buff the surface. This imparts an enhanced shine and an even smoother texture.
Remember, the path to a flawless finish is paved with practice, patience, and meticulous attention to detail. By adhering to these expert tips and techniques, you’ll be well on your way to achieving a professional result, whether you opt for polyurethane over lacquer or any other finishing method.
Dealing with Common Issues and Troubleshooting:
Achieving a flawless finish is an art that demands preparation, vigilance, and the ability to troubleshoot. In the realm of woodworking, unexpected hiccups can sometimes disrupt your path to perfection. With the right techniques, you can address common problems and still attain that sought-after polyurethane over lacquer finish.
Battling Bubbles and Blisters:
One frequent adversary on the road to a perfect finish is the emergence of bubbles or blisters in the coating. This vexing issue can be triggered by factors like applying the finish in high humidity or distributing polyurethane unevenly. To combat this problem, take these steps:
Sanding:
Gently sand the affected area with fine-grit sandpaper to level the surface and prepare it for reapplication.
Proper Application:
Reapply the finish using a brush or foam applicator, ensuring even coverage.
Follow Instructions:
Strictly adhere to the manufacturer’s guidelines regarding drying and curing times to prevent future bubbling.
Tackling Brush Strokes and Unevenness:
The appearance of brush strokes or unevenness in the finish can be disheartening, often stemming from the use of a low-quality brush or overly thick polyurethane application. Counter this issue with these strategies:
Quality Brush:
Opt for a high-quality brush specifically designed for finishes to achieve smoother application.
Thin Coats:
Apply thin coats of polyurethane, allowing each coat to dry completely before adding the next.
Intermittent Sanding:
Lightly sand between coats to eliminate imperfections and ensure a uniform finish.
Dust and Debris Dilemma:
Despite your best efforts, dust and debris may occasionally infiltrate the finish, marring its appearance. To resolve this issue:
Wait for Full Drying:
Allow the finish to dry completely.
Careful Sanding:
Carefully sand the affected area with fine-grit sandpaper to eliminate dust particles.
Cleaning:
Wipe away any residual dust with a clean, lint-free cloth or tack cloth.
Seamless Blending:
Apply a thin coat of polyurethane over the sanded area, ensuring a seamless blend with the surrounding finish.
Restoring Lost Luster
Over time, the finish may lose its shine, leaving you with a dull surface. To restore its former glory:
Buffing for Brilliance:
Revive the glossy finish by buffing the surface with a high-quality polishing compound, rejuvenating the luster.
Achieving a flawless finish is a journey that requires practice and patience. Don’t be disheartened by setbacks. With the right troubleshooting techniques and a touch of perseverance, you’ll overcome common issues and attain the beautiful polyurethane over lacquer finish you’ve been envisioning.
Navigating Curing and Drying Times for Polyurethane Over Lacquer:
When delving into the realm of applying polyurethane over lacquer, comprehending the nuances of curing and drying times becomes paramount in the pursuit of a flawless finish.
Polyurethane, with its renowned durability and protective attributes, is a favored choice for bolstering the safeguarding capabilities of lacquer. Nevertheless, it’s imperative to acknowledge that polyurethane operates on a distinct timetable compared to its lacquer counterpart.
Curing Time: Forging Durability
The term ‘curing time’ denotes the duration required for polyurethane to solidify and attain its zenith of durability.
This process typically spans a timeframe ranging from 24 to 48 hours. The specific duration may be influenced by variables such as ambient temperature and humidity levels.
To ensure that the polyurethane establishes a robust bond and confers the desired level of protection, affording ample curing time is indispensable.
Drying Time: The Period of Prudence:
Conversely, ‘drying time’ pertains to the period during which the polyurethane can be touched and handled without risking damage or smudging. While the surface may assume a semblance of dryness after a few hours, it is judicious to exercise patience and refrain from subjecting the finish to heavy use or applying supplementary coats for at least 24 hours.
The compatibility between polyurethane and lacquer warrants careful consideration. Before superimposing polyurethane onto lacquer, it is imperative to confirm that the lacquer has undergone complete curing and drying.
This precautionary measure serves to forestall any potential issues relating to adhesion or compatibility between the two distinct finishes.
By assimilating and adhering to the prescribed curing and drying intervals, the attainment of a flawless finish when applying polyurethane over lacquer is a reality within reach.
Patience emerges as the linchpin of this process, for allowing ample time for each coat to cure and dry will yield a finish that is not only enduring but also visually captivating, elevating both the aesthetics and durability of your project.
Final touches and maintenance for a long-lasting finish:
After all the hard work you’ve put into applying polyurethane over lacquer, it’s important to give your project the final touches and ensure its long-lasting beauty. Here are some essential tips for maintaining a flawless finish:
Allow proper curing time:
Polyurethane takes time to fully cure and harden. It is crucial to follow the manufacturer’s instructions regarding the recommended curing time. Avoid subjecting the surface to heavy use or placing objects on it before it is completely cured.
Handle with care:
While polyurethane provides excellent durability, it is still important to handle your finished project with care. Avoid dragging heavy objects or using sharp tools directly on the surface, as this may cause scratches or damage to the finish.
Regular cleaning:
Keep your finished project clean by regularly dusting or gently wiping it with a soft cloth. Avoid using abrasive cleaners or harsh chemicals that can strip away the protective layer of polyurethane.
Protect from moisture and heat:
Polyurethane is resistant to moisture, but excessive exposure to water or heat can still damage the finish. Use coasters or mats to protect surfaces from hot dishes, cups, or wet objects.
Touch-up as needed:
Over time, your finish may develop small scratches or areas that need touch-ups. For minor imperfections, use a fine-grit sandpaper to gently smooth the surface, and then apply a thin coat of polyurethane to restore the protective layer.
Periodic maintenance:
Depending on the level of use, periodic maintenance may be necessary to keep the finish looking its best. This could involve applying a fresh coat of polyurethane every few years or as recommended by the manufacturer.
By following these final touches and maintenance tips, you will ensure that your polyurethane over lacquer finish remains flawless and stands the test of time. Enjoy the beauty and durability of your finished project for years to come.
Conclusion:
This article explores the differences between polyurethane and lacquer in woodworking, focusing on their properties, advantages, and considerations.
Polyurethane is durable and protective, ideal for surfaces with heavy use and harsh conditions, while lacquer enhances wood’s natural beauty but requires more attention to maintain its appearance.
Surface preparation is crucial, with lacquer being a base coat for polyurethane or directly applied. The process of sanding, preparation, and expert tips provide a comprehensive toolkit for perfecting the finish.
Maintenance is essential for preserving the finish’s beauty and durability. Adequate curing time, careful handling, regular cleaning, and periodic maintenance are essential.
The path to a flawless finish is a labor of dedication and attention to detail, and with patience and practice, woodworkers can create masterpieces that showcase aesthetics and resilience, leaving a lasting mark in the world of craftsmanship.
FAQs About Can You Put Polyurethane Over Lacquer?
Can you apply polyurethane over lacquer directly?
Applying polyurethane over lacquer is possible, but it requires careful preparation. You need to ensure that the lacquer is fully cured and properly prepared for the polyurethane to adhere effectively.
Why would someone want to put polyurethane over lacquer?
Polyurethane is often used over lacquer to provide enhanced durability and protection. It can create a more robust finish that is resistant to scratches, moisture, and UV damage. This combination is popular for surfaces that require extra toughness.
Are there any compatibility issues between polyurethane and lacquer?
Compatibility can be an issue, especially if the lacquer is not fully cured. It’s essential to ensure the lacquer is completely dry before applying polyurethane. Failing to do so may lead to adhesion problems and a less durable finish.
Should I use oil-based or water-based polyurethane over lacquer?
The choice between oil-based and water-based polyurethane depends on your specific project requirements. Water-based polyurethane offers a quicker drying time and is low in odor, while oil-based polyurethane provides a more traditional amber-toned finish and greater durability.
Can I apply additional coats of polyurethane over lacquer if needed?
Yes, you can apply multiple coats of polyurethane over lacquer to achieve the desired level of protection and aesthetics. Ensure that each coat is properly dried and follow the manufacturer’s recommendations for application and drying times.